Key takeaways
Heading 1
Heading 2
Heading 3
Heading 4
Heading 5
Heading 6
Lorem ipsum dolor sit amet, consectetur adipiscing elit, sed do eiusmod tempor incididunt ut labore et dolore magna aliqua. Ut enim ad minim veniam, quis nostrud exercitation ullamco laboris nisi ut aliquip ex ea commodo consequat. Duis aute irure dolor in reprehenderit in voluptate velit esse cillum dolore eu fugiat nulla pariatur.
Block quote
Ordered list
- Item 1
- Item 2
- Item 3
Unordered list
- Item A
- Item B
- Item C
Bold text
Emphasis
Superscript
Subscript

According to a Thompson Reuters, respondents who use document automation for lease agreements (22%) report that they have time to Leverage workflows to develop new business models with clients and Win new clients with better business development.
How to:
Step 1: Setting the Stage
Before you can start creating snippets, you'll need to ensure that your recording settings are configured correctly. When scheduling a meeting, double-check that the recording bot settings are enabled to capture the specific meeting you're interested in. If not, don't worry, you can invite the bot directly from the meeting page. Simply open Superlayer, navigate to your agenda, and click on the meeting event to get started.
Step 2: Recording and Retrieving
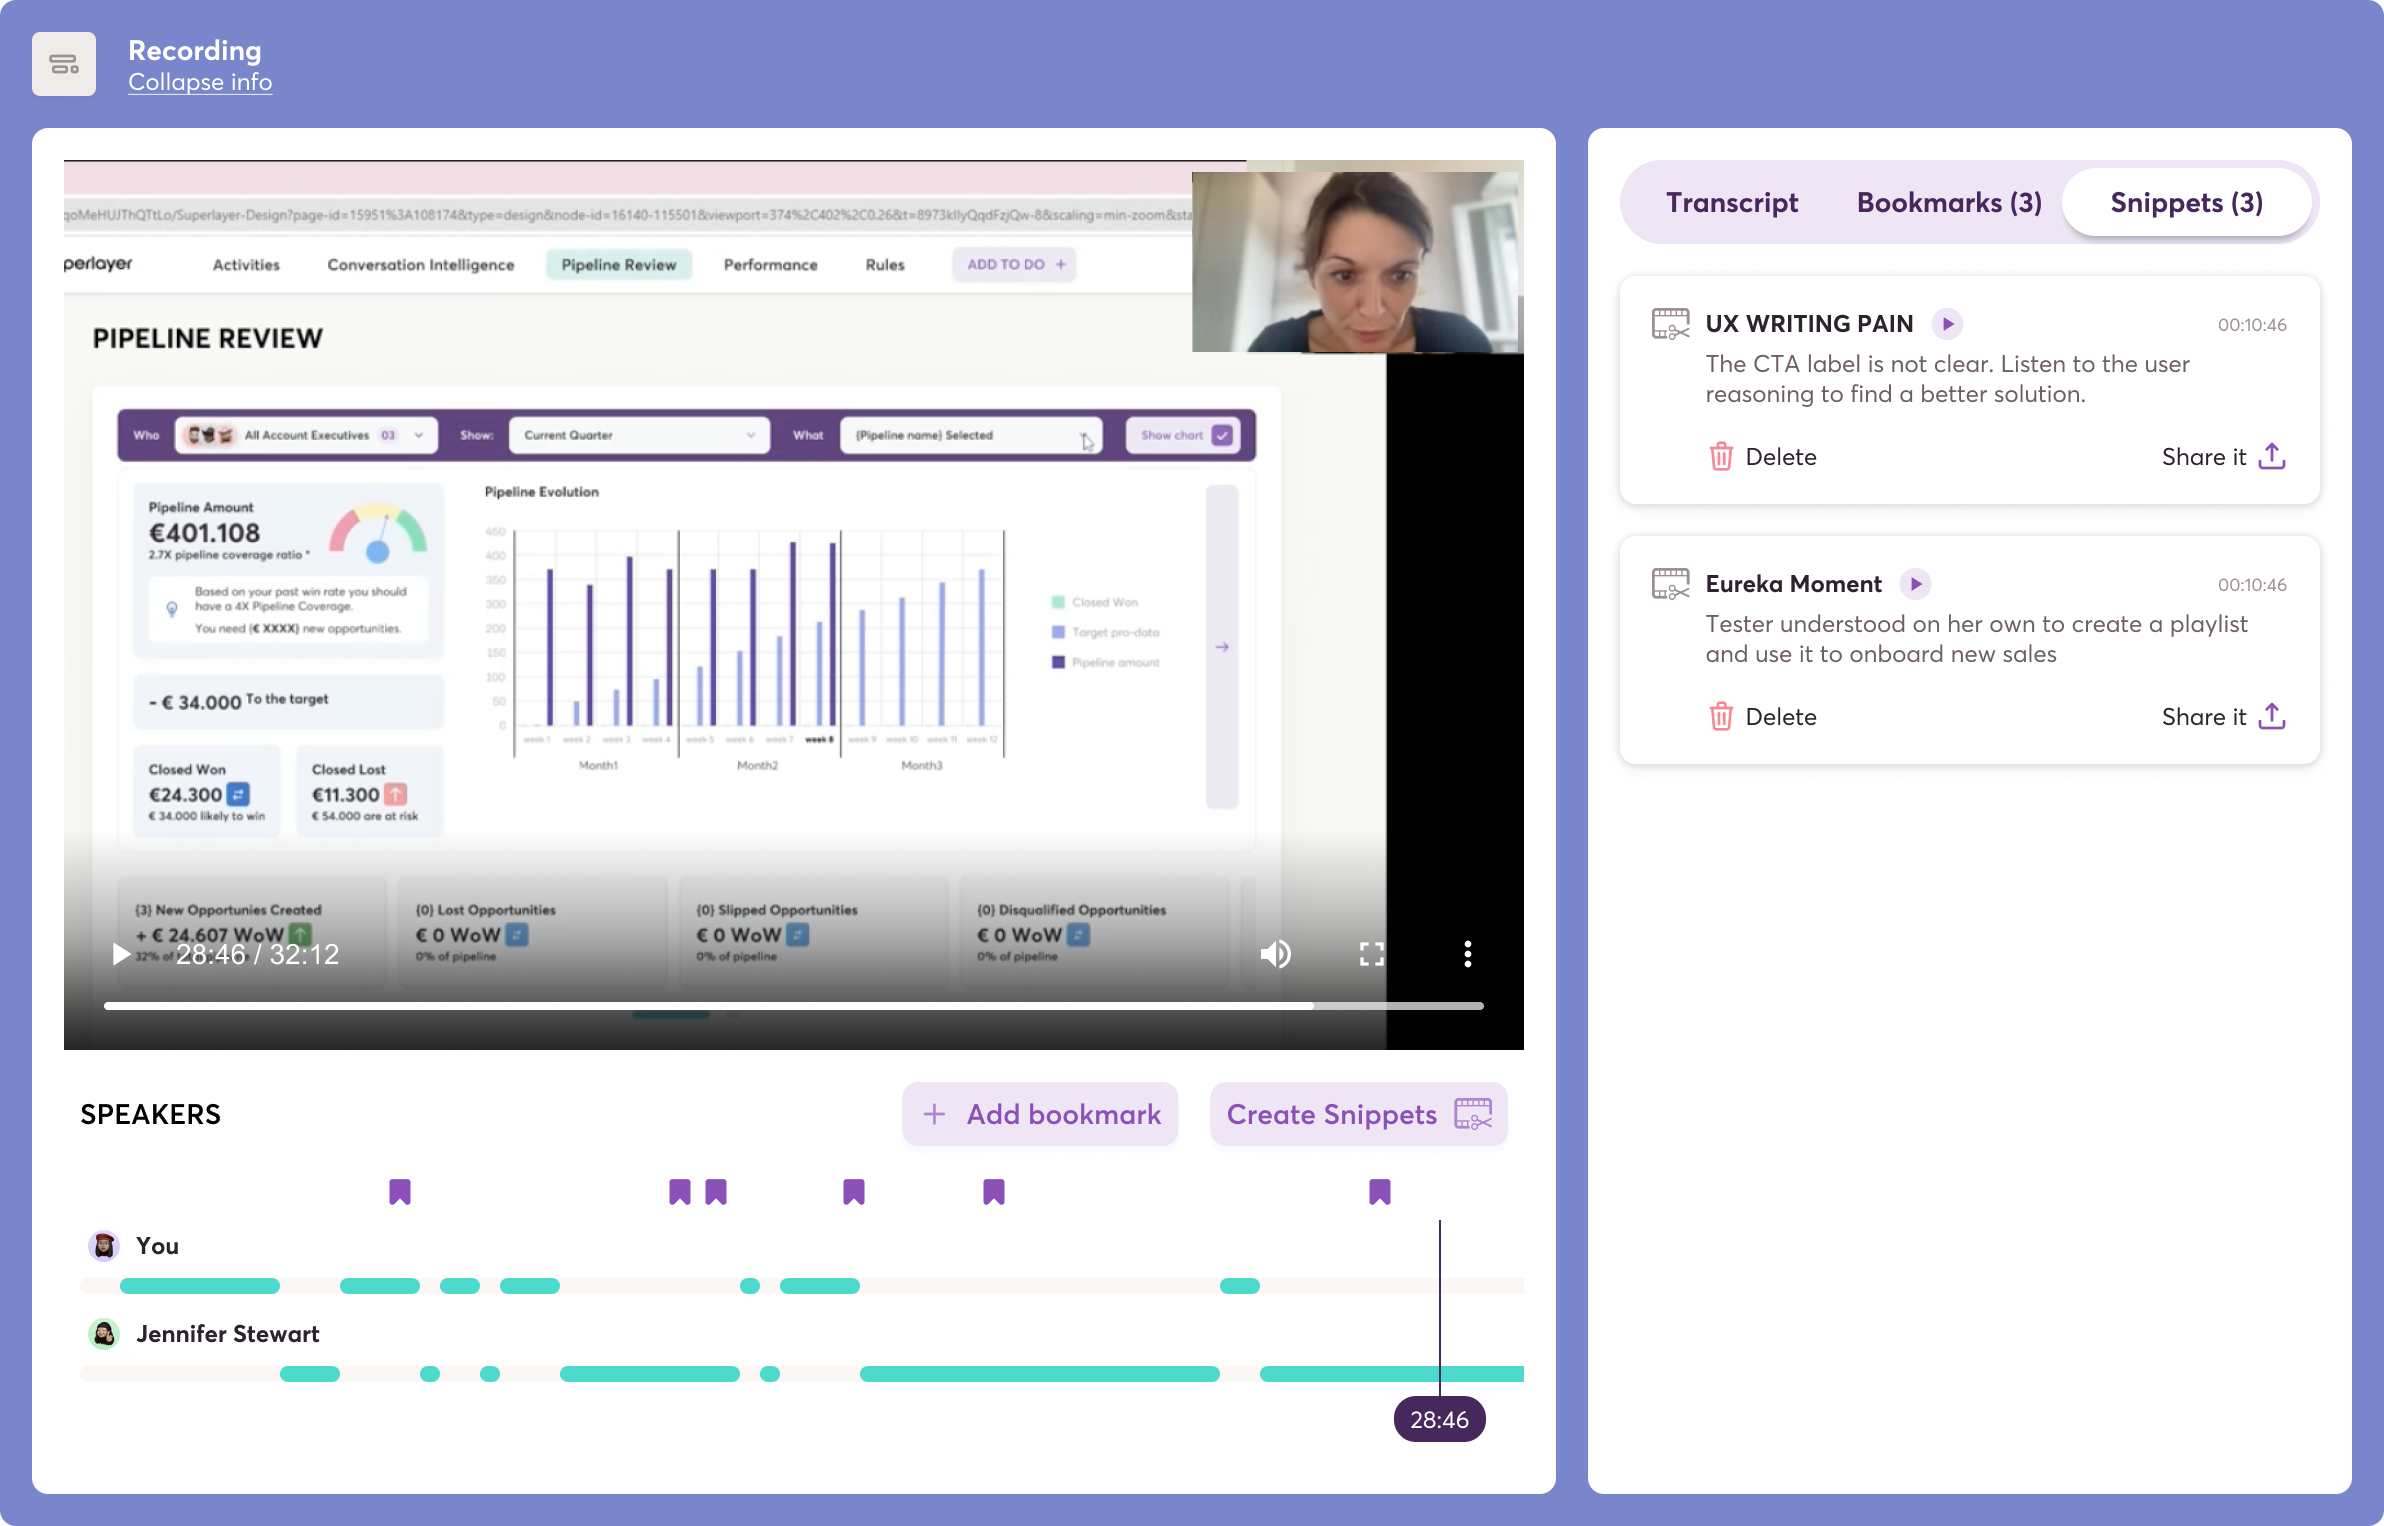
Once your meeting is done, head back to the meeting page. Right below the video preview, you'll spot a button labeled "Create a snippet." This is where the magic happens.

Step 3: Crafting the Perfect Snippet
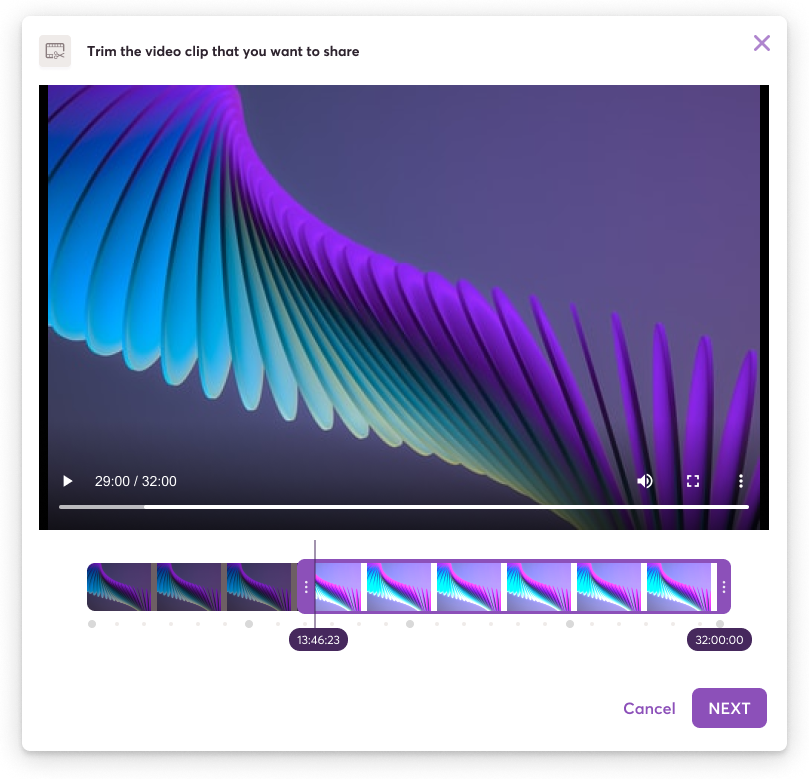
Clicking "Create a snippet" opens an overlay, unveiling the video player and a preview of the video frames. Here's where the fun begins. By dragging the left and right handles, you can precisely select the snippet's starting and ending points. This level of control ensures that your snippet captures exactly what you want to highlight.

Step 4: Personalizing Your Snippet
With your snippet's content selected, click "next." Now, you'll be prompted to provide a name and description for your trimmed video. This step adds context and makes it easier to find and share your snippet when needed. Once you're satisfied with your input, hit "create."
Step 5: Share and Shine
Depending on the snippet's duration, it'll take just a few seconds to generate. You'll get a link that you can use to share the snippet with colleagues, clients, or anyone else who needs to see it. You can either copy the link or simply close the popup, knowing that your snippet is ready for action.
Step 6: Organize, Share, and Shine
But the Snippets feature doesn't stop there. All the snippets created from a call recording are neatly listed in the Snippets tab, located on the right of the video player in the meeting page. This is where you can organize your insights, start creating focused playlists, and share valuable content with ease.
Conclusion
The Snippets feature isn't just about breaking down recordings; it's about breaking through the noise to share the most critical insights. With this tool in your arsenal, you have the power to distill your meetings into actionable, shareable content that drives your sales success. Whether you're creating focused playlists or sharing crucial moments, Snippets give you the edge you need in the competitive world of sales.


